|
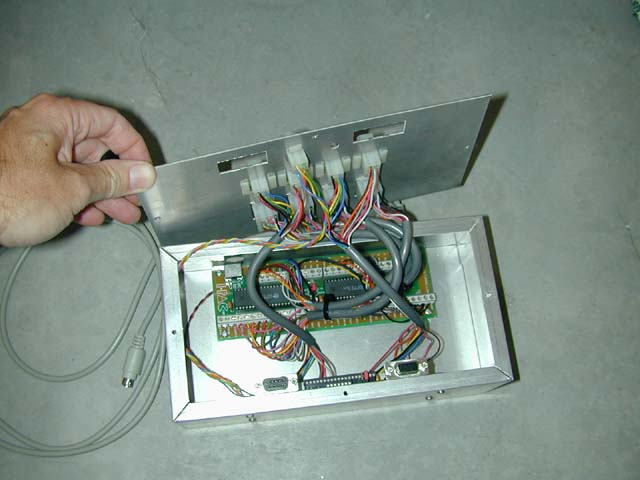
MAMEP3.KID The PC Workings Now that I had connectors wired up from the cabinet, I needed a way to get them to the PC. And I knew I wanted to put a Dreamcast into the system as well so the system needed to be quickly interchangeable. I figured the cleanest way to do this would be to make a control box for each system that could be plugged into externally. This would avoid the tangled mess of wires I've seen on some other cabinets. I had read numerous good reviews of the I-PAC and OptiPAC interfaces from Ultimarc. These interfaces would allow for control of up to four players as well as trackballs and spinners that I know I will be adding later. Below is a picture of the PC control box that I fabricated. At the back of the box is an IPAC4 interface. This is wired to four connectors on the front panel, one for each player. Each connector has up, down, left, right, 6 buttons, player start button and a ground connection. On the bottom of the box is the OptiPAC interface which will allow trackball and spinner usage. It is wired to five connectors on the front panel - Trackball 1 and 2, Spinner 1 and 2, and mouse button inputs.
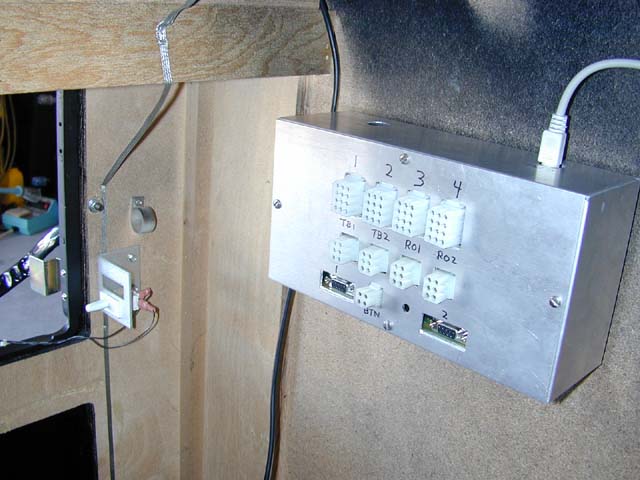
This is how the box looks mounted on the inside of the cabinet. You can see the keyboard connectors visible on the top of the box. To get player control into the PC, I only need to run a PS2 cable (and serial cable if trackball/spinner usage is desired) to the computer, then plug the appropriate cabinet controls into the front of the box.
For video, I decided to use the original cabinet monitor for a number of reasons -
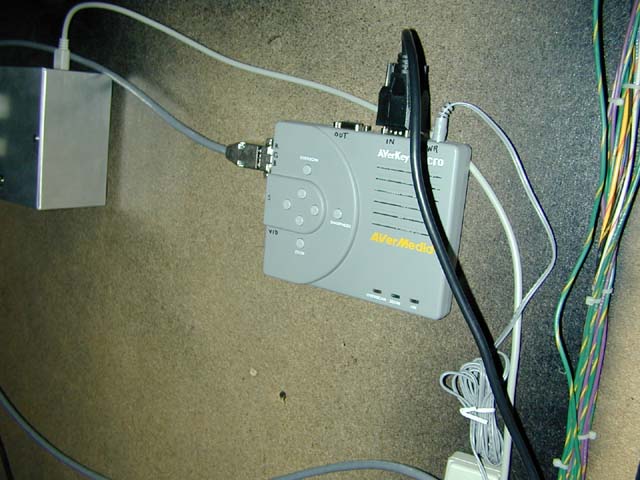
Having made this decision, I knew it was necessary to convert the computer output to something the arcade monitor could use. Some people have used ARCADEOS for this, but I didn't want to be stuck running in DOS or using a specific video card. A scan converter is what would be necessary. A trip to my local Fry's provided me with an inexpensive solution - an AVerKey iMicro. I chose this unit not only because it was fairly inexpensive (you DO get what you pay for in scan converters) but mainly because it had a SCART RGB output.
SCART is a standard that is used in Europe. It's a very versatile connection system that allows for multiple types of high quality video/audio connections to be connected to home TV/monitors. The only part I was interested in was the fact that SCART has RGBS capability, something I would need to get the arcade monitor to function. The documentation that came with the converter had absolutely no documentation about the SCART connector on the side of the unit. Makes sense, since I bought it here in the US where most people have never heard of SCART. A quick phone call to an AVerKey engineer provided me with the pinout information for that connector. One custom cable later and I was ready to hook it up to my cabinet. Remember that cable I made from the JAMMA connector? The cable from the AVerKey plugs right into it. The pinout for the AVeryKey iMicro 15 pin SCART connector is as follows -
|